Getting Started with Wolverine as Message Bus
TIP
As of Wolverine 3.0, you can now connect to multiple Rabbit MQ brokers from one application. We will extend this support to other message broker types in the future.
There's certainly some value in Wolverine just being a command bus running inside of a single process, but now it's time to utilize Wolverine to both publish and process messages received through external infrastructure like Rabbit MQ or Pulsar.
Terminology
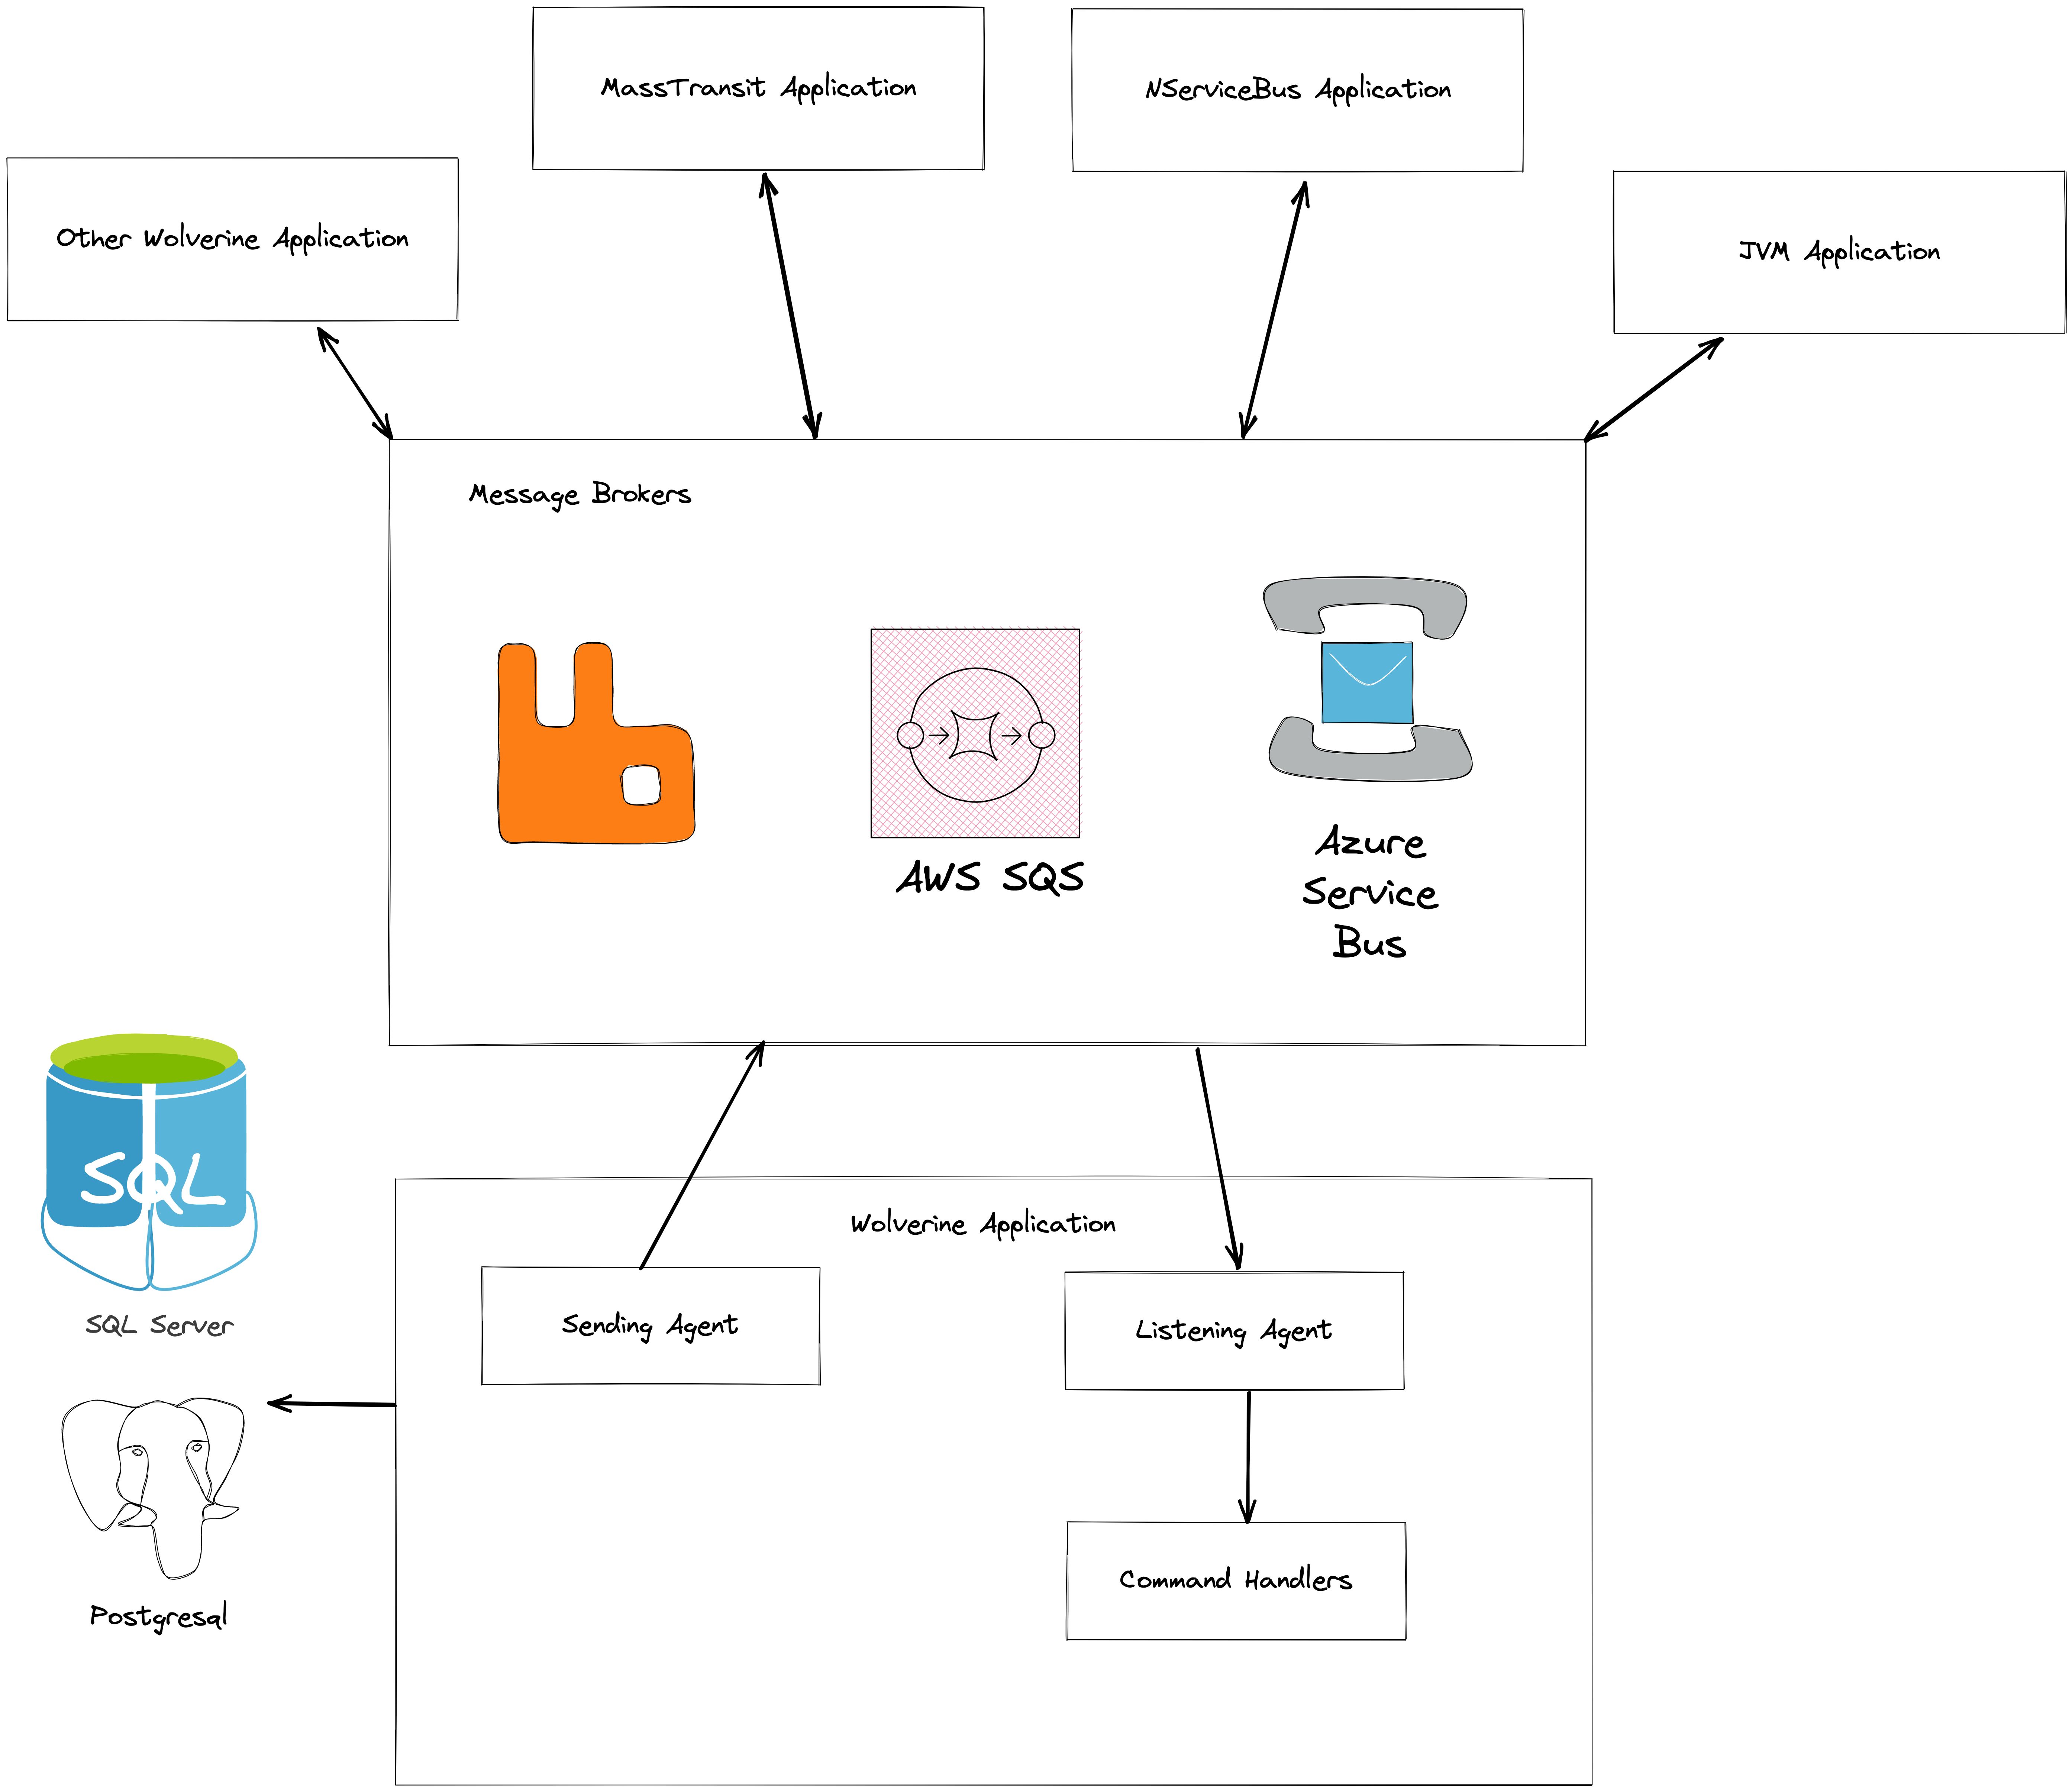
To put this into perspective, here's how a Wolverine application could be connected to the outside world:

TIP
The diagram above should just say "Message Handler" as Wolverine makes no structural differentiation between commands or events, but Jeremy is being too lazy to fix the diagram.
Configuring Messaging
There's a couple moving parts to using Wolverine as a messaging bus. You'll need to configure connectivity to external infrastructure like Rabbit MQ brokers, set up listening endpoints, and create routing rules to teach Wolverine where and how to send your messages.
The TCP transport is built in, and the "local" in memory queues can be used like a transport, but you'll need to configure connectivity for every other type of messaging transport adapter to external infrastructure. In all cases so far, the connectivity to external transports is done through an extension method on WolverineOptions using the Use[ToolName]() idiom that is now common across .NET tools.
For an example, here's connecting to a Rabbit MQ broker:
using JasperFx;
using Wolverine;
using Wolverine.RabbitMQ;

var builder = WebApplication.CreateBuilder(args);

builder.Host.UseWolverine(opts =>
{
    // Using the Rabbit MQ URI specification: https://www.rabbitmq.com/uri-spec.html
    opts.UseRabbitMq(new Uri(builder.Configuration["rabbitmq"]));

    // Or connect locally as you might for development purposes
    opts.UseRabbitMq();

    // Or do it more programmatically:
    opts.UseRabbitMq(rabbit =>
    {
        rabbit.HostName = builder.Configuration["rabbitmq_host"];
        rabbit.VirtualHost = builder.Configuration["rabbitmq_virtual_host"];
        rabbit.UserName = builder.Configuration["rabbitmq_username"];

        // and you get the point, you get full control over the Rabbit MQ
        // connection here for the times you need that
    });
});
